


|
Printer Friendly Version
|
User Guide |
|
Introduction:
- PSYS_SRC_INNERANGLE (deprecated and replaced by a newer angle parameter)
- PSYS_SRC_OUTERANGLE (deprecated and replaced by a newer angle parameter)
- and the useless and non-functional PSYS_SRC_PATTERN_ANGLE_CONE_EMPTY pattern.
The Porgan 1800 allows you to craft not just one, but up to three distinct particle effects and then replicate those effects easily in an mod/copy/trans object called a 'Chord'. It can also produce full or partial scripts that replicate the effects you create.
You can SAVE effects into your own Personal Preset Library for easy retrieval later, or, you can re-[IMPORT] the Chords you've created, as a starting point for a new effect.
All known llParticleSystem() Parameters, Patterns and Options have been implemented in the Porgan 1800 with three deliberate exceptions:
The Porgan 1800 v0.1 was originally released in November 2008. v0.3 was released in the spring of 2009. V1.0 is a major overhaul of the device and brings the total time invested in this project to two straight months of scripting, incorporating numerous suggestions and requests from novice builders and advanced content creators. I sincerely hope you enjoy using this device... if not, please let me know why so I can improve it! =)
The Controls
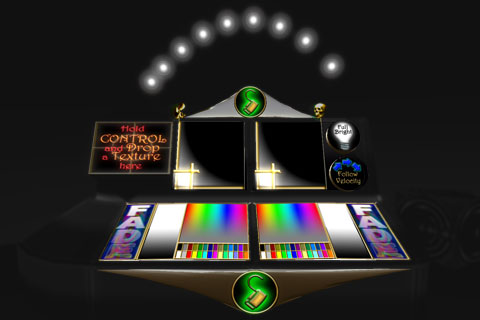
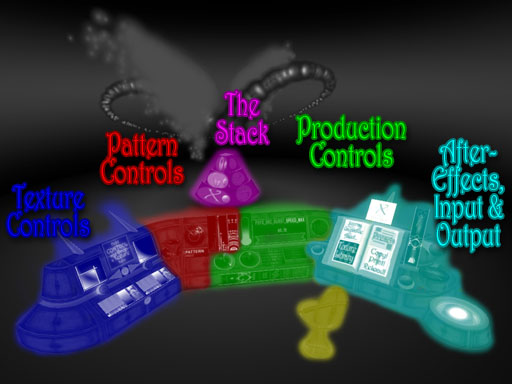
The Porgan 1800 console may seem overwhelming at first, but the layout designed so that similar controls are arranged near each other in a logical progression that flows naturally from left to right...
TEXTURE controls on the left side relate to color, size, transparency, texture image, 'full bright' and a very limited texture rotation option. Behind this part of the console is a preview of what your particle's texture will look like as it ages.
PATTERN controls affect WHERE new particles are created, and their starting velocity/trajectory.o
THE STACK is the three particle emitters that can be turned on/off and edited. You'll be looking at this often as you customize your effects.
PRODUCTION controls affect the particle's lifespan, how rapidly new bursts of particles are created and how many particles are in each burst. It also includes an emitter 'auto-stop' control, and a particle counter display.
AFTER-EFFECTS/INFLUENCES are all the controls that cause your particle to change it's trajectory after it's been created.
INPUT/OUTPUT controls are where you load in pre-existing effects (presets, old 'chords') or output rezzed copies of your effects (called 'chords'), as well as options to generate full or partial scripts (in chat or via web). You can also save effects as presets for later retrieval.
The Porgan Operator's Chair can be rezzed from the [Owner's Options] menu. If you've put your Porgan 1800 into (Restricted) mode, only you, the owner, or a guest sitting in the chair rezzed by the porgan may operate the device.
Note: The above image is from The Porgan 1800 v0.3 and a bit out of date. The zones are much the same however. The images below are up to date with The Porgan 1800 version 1.0.
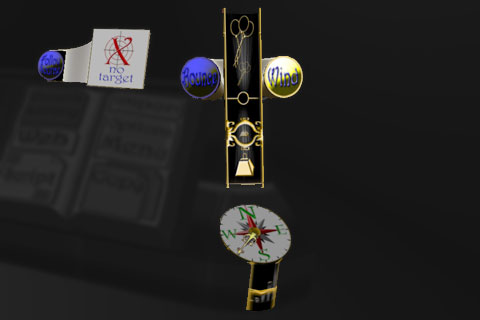
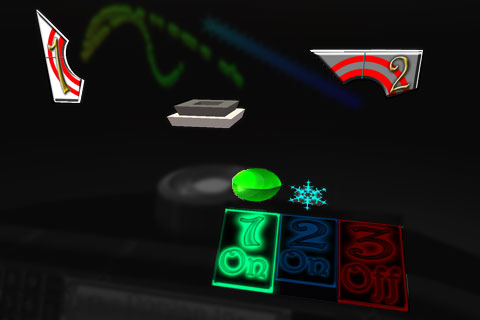
Before we dive into the controls, a quick tip and some explanations: The first control to learn is the The Effect Selector, you'll find it on top of the Porgan console, just right of center.
Touch the Effect Selector's [1] [2] [3] buttons (shown here) to SELECT or DE-ACTIVATE the individual Porgan's particle emitters.
Warning: The other controls on the Porgan will be ignored when all three emitters are OFF.
Above each of the selector buttons is a particle texture/color display, to help you remember which effect is associated with each emitter number.
More about the oddly shaped [1]&[2] prims in the background of this image later, in the TARGETS section.
(Controls on the right side of the book may only be used by the console's owner. We'll go into the other book options in more detail below.)
The Texture Controls - The left side of the console controls your effects particle TEXTURE. You can provide a texture, set it's SCALE, COLOR and ALPHA, as well as FULL_BRIGHT and, in a very limited sense, the texture's rotation.
Particles can be one size at birth, and gradually transition to a different size at the end of their lifespan. Same for Color and Alpha. The LOCK/UNLOCK buttons prevent that attribute from changing over the lifespan of the particle.
The button on the upper-right side toggles the particle texture's FULL BRIGHT attribute (officiall called EMMISSIVE).
Below it is the FOLLOW_VELOCITY option which toggles whether or not the particle texture will rotate or 'tilt' towards the direction it's moving, or will remain top-up. llParticleSystem() allows no other method for rotating particle textures. Note: If Follow Velocity is enabled, particles that never move will NOT be seen. (this button will glow red warning you of the problem)
The Texture Drop-Box on the left is where you set textures to use. As it says, hold the CONTROL key down when you drop the texture to put it INTO the prim instead of ONTO the prim. To revert to the default particle texture, touch the dropbox again to clear it. If the texture drop box has BLUE text, then the porgan is in "Restricted" mode.
Above this part of the console is a brief "preview" display that will show the particles with your texture, their starting and ending color, size, scale, including FULL BRIGHT and/or FOLLOW_VELOCITY if you've enabled them.
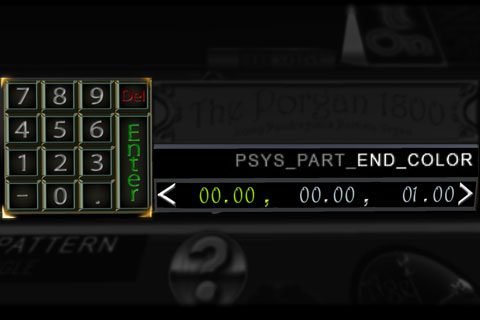
The Keypad and Parameter DisplayTake a look at the center of the console as you adjust the texture attributes. Anytime you change color, alpha, scale, or the emissive and follow_velocity options, the parameter display in the center of the console will echo what you just did. Touch the (?) (hint) button below the label and value display for more information about that parameter. If you've just adjusted a numeric parameter, the KEYPAD will light up allowing you to type in an exact value instead.
Some parameters, like COLOR and SCALE are multi-part "vectors". Touch the numeric display to select which part you want to overwrite to hilight it, and then type in the replacement value on the keypad.
The number keypad and numeric display will update for nearly every control on the porgan that affects your particle display.
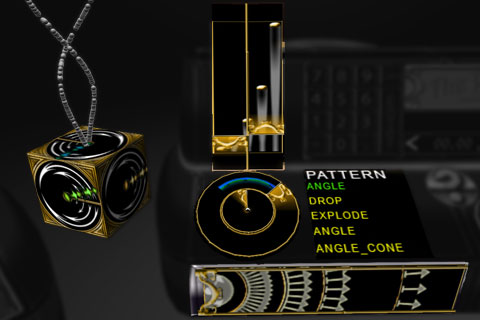
The Placement Controls allow you to adjust WHERE new particles are created and set their initial velocity.
PATTERN - There are four: The RADIUS control at the bottom sets how far from the center of the prim the new new particles will be created. DROP and some other options disable the ability to use RADIUS, and the control will vanish when it can not be used.
The INITIAL VELOCITY controls (top middle of the image) set a MINIMUM starting velocity and a MAXIMUM starting velocity. Each particle created will be moving at some random speed between those two limits. This control vanishes if the DROP pattern is selected.
The ANGLE controls (the dial in the center), like initial velocity, is used to prevent particles from being sprayed in certain radial directions. NOTE: The ANGLE patterns are always symmetrical, you may have to rotate the prim to get it to spray in the direction you desire. ANGLE controls vanish if a non-angle pattern is selected.
The OMEGA Cube - when using ANGLE patterns, the OMEGA cube causes the direction of spray to rotate after each burst of particles is created (burst rate, (in the next panel) has a huge effect on OMEGA). Rotation occurs around the GLOBAL X, Y and Z axis and will ignore the rotation of the prim. When used, the omega cube briefly emits a double strand of particles demonstrating how OMEGA will impact your effect. The omega cube also vanishes if a non-angle pattern is selected.
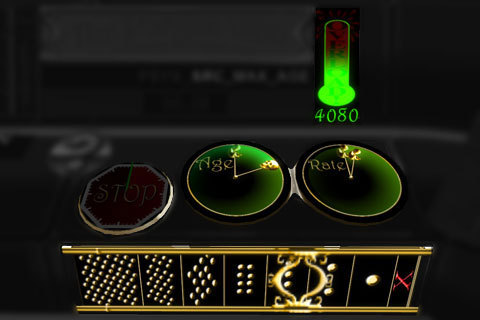
The Production Controls RATE - sets how rapidly new bursts of particles are created.
AGE - sets the lifespan (in seconds) that each particle will live.
COUNT - (along the bottom) sets how MANY particles the emitter will try to create in each burst
STOP - is a fickle auto-stop timer for the emitter, usually disabled. When used the emitter will create new bursts of particles until the timer expires. The countdown will start over again anytime the object or prim comes into view or gets edited by someone or updated by a script. This tendency to restart unexpectedly causes more people confusion than nearly any other particle parameter. =) The real name for this attribute is PSYS_SRC_MAX_AGE.
The Overload Indicator - **IMPORTANT** Most viewer's can only see up to 4096 particles at one time. That is not per emitter! That's from all emitters combined. The most anyone can see is 8192 particles, if they've adjusted their graphics preferences. It is VERY easy to abuse AGE, RATE and COUNT, creating a single emitter that is attempting to draw MORE than 8192 particles, which causes nearby effects to "starve", unable to draw particles because they're all used up. WATCH THE OVERLOAD INDICATOR CLOSELY. If your effect is too greedy, dial it down! As a general rule, use COUNT of 1 or 2 if your RATE is very rapid.
The After Effects or Influences controls these affect where your particles go AFTER they're born. A particle's initial velocity will remain unchanged if all these are off. If any of these are enabled, they will gradually overpower the particle's intial velocity, often causing it to change direction.
GRAVITY - The "balloons & weights" slider in the middle adds an upward or downward 'constant force' to your particle effect. Slide the slider down to make particles act as if they're "heavy" (This is the Z value of the ACCEL parameter)
The Compass - Like the gravity control, but blows particles in a specific compass direction. The slider on the side of the compass sets the strength of this constant force. Use a slight force for long lived particles, use a stronger force for short-lived particles. (This sets the X and Y values of the ACCEL parameter)
BOUNCE - if your particles have gravity, enabling BOUNCE will cause them to be deflected UPWARDS if they attempt to fall below the altitude of the prim that's emitting them. (Particles do not bounce off of prims or ground)
WIND - allows the region's random 'wind' parameter to push particles around, there is no strength control over this attribute. Long lived particles can end up rather far from their emitter. Try not to irritate your neighbors with windy-wandering particles.
Follow_SRC - (far left) .. this is a rarely used option that is only useful for emitter prims THAT MOVE. It causes the prim's particles to move in lockstep with the prim (normally the're left trailing behind). Particles will not ROTATE with the prim if it rotates however. Note: Using this option disables the RADIUS attribute in the placement controls.
TARGETS - more detail on this in the next section.
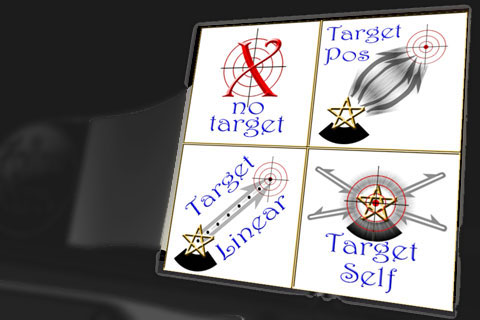
There are FOUR target options available on the Porgan 1800
NO TARGET - disables the targeting option entirely and let's particles travel where they will.
TARGET SELF - When particles reach their end of life, they will return to the prim that emitted them, as if it were a blackhole in space. You may have to increase the initial velocity and AGE of particles to compensate for this target type.
TARGET POS - (also known as TARGET OTHER), will enable the use of the porgan's built-in target prims. Similar to TARGET SELF, but in this case, another prim becomes the 'blackhole' sucking the particles into it.
TARGET LINEAR - a very different and unusual targeting type. When used, particles march single file, evenly spaced, from emitter to target prim, travelling at a uniform speed. Density of particles in the line is affected by the AGE and RATE parameters. If the emitter and/or target prims move, the particles will always be in a straight line between the two. This option disables MANY of the particle parameters: Radius, Initial Velocity, all Angle controls, Wind, Accel (gravity and compass force).
[Presets Library] -> (*SAVE*) allows you save your current effects as a preset. You will receive more instructions on how to use this function the first time you use it. More about the Personal Presets Volume in a moment.
[More...] -> (script2chat) - will cause the porgan to paste a copy of the particle functions into private chat to you. Cut and paste these into a script to use them.
[Script] -> will give you a link to a web page containing a variety of complete scripts that will replicate the effect you've just created
[Copy] -> will rez a duplicate copy the current effect. It will claim to be (no modify) when you take it into inventory, but that's misleading. Only the script itself is (no mod) the prims are full perms. NOTE: The description field of the rezzed prims will look very strange. The reason for this is the 'smart script' in the rezzed effect memorizes the particle effect when it's created. If the script is (reset) it will forget the effect. (using Shift-Drag to copy an object will reset it's scripts!) The porgan's rezzed copies are shift-drag-copy-safe, they will re-read their particle settings from the compressed description field.
The rezzed copies also contain built-in target prims (if you used the two target types that enable them) and a CONTROLLER TEMPLATE that you can modify to set rules for when your effect should turn ON and OFF.
[IMPORT] allows you to control-drop a rezzed copy back into the porgan, have it scan it and allow you to continue working on the effect. [import] and [copy] are restricted to the console's owner, and you may only [import] rezzed copies you created yourself.
[Owner's Options] - allow you to restrict/unrestrict guest access to your console, rez an operator's chair and set the console's 'theme', there are several built-in themes, and you can provide your own console texture as well. Set the particle start and end color and texture and then experiment with the THEME options.
[More...] -> (Clear All) - will wipe the current effects clean so you can start over. If the DISPLAY prim can't re-assemble itself, touch the pedestal in front of the porgan to force it to delete and rez a new display object.
[More...] -> (Inspect) - allows you to view the value of one of the effect's parameters, without touching (and adjusting) the control associated with it. This is useful if you want to see what a value is and then over-write it withe numeric keypad.
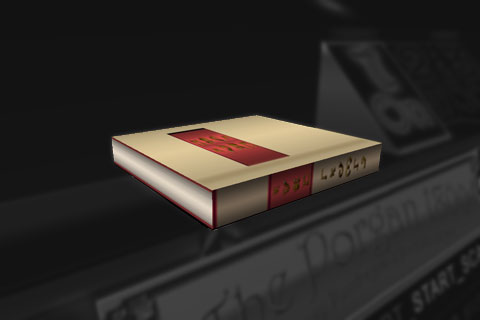
The Personal Presets Volume (or "PPV")- this book will be rezzed to the left of the effect selector controls on your porgan the first time you attempt to SAVE a preset. This object is SEPERATE from your porgan console and you can update/modify it. Simply open the PPV, edit and rename the notecards contained within it and touch it when you wish to re-load one of your presets.
Warning: if you change the name of the PPV the porgan will not see it and will give you another instructional notecard and try to rez another PPV everytime you save a preset. (you can change the "number" part of the PPV's name safely however). Conversely, if a PPV is nearby, it won't rez another.
Make sure you take a backup copy of your PPV into your inventory from time to time to make sure you don't lose your work.
The PPV feeds particle parameters back into the porgan on channel /7. If you're the brave and clever sort, you're welcome to hack your preset notecards if you like. You can make presets that only update certain parameters instead of all of them.
You can also use the SAVE PRESET option to copy an effect from one emitter to another. Just hit SAVE PRESET, select the emitter you wish to copy the effect to, and copy'n'paste the preset lines in chat... back into chat. =)
There are two other special channel /7 commands: |
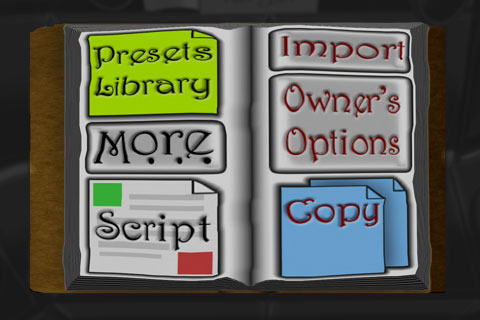 The Book contains several different INPUT and OUTPUT options. For now, simply click on the [Presets Library] button and navigate the menu to pick one of the sample Preset effects.